Introduction: Why Homemade Cream Cheese Is a Game-Changer
Did you know most store-bought cream cheese contains preservatives, stabilizers, and artificial additives? If you’re someone who values freshness and natural ingredients, discovering how to make homemade cream cheese can be a transformative experience. Not only is it fresher and tastier, but it’s also customizable, cost-effective, and surprisingly simple to make at home.
In this guide, we’ll walk you through the process of making homemade cream cheese, discuss its benefits, and share tips for troubleshooting and flavoring your creation. Whether you’re a home cook or a curious foodie, this tutorial will have you whipping up creamy, tangy, and versatile cream cheese in no time. Let’s get started!
Why Choose Homemade Cream Cheese?
Health Benefits of Homemade Cream Cheese
Unlike store-bought options, homemade cream cheese is free from preservatives, gums, and unnecessary additives. Using fresh and natural ingredients ensures a healthier product. Plus, you can customize it based on your dietary needs. Whether you prefer full-fat, low-fat, or even lactose-free cream cheese, making it at home gives you complete control.
Cost Savings and Quality
Store-bought cream cheese often costs $4–$6 per pack, but you can create a batch of homemade cream cheese for as little as $0.50–$1. The cost savings add up, especially if you use cream cheese regularly in recipes or as a spread. Plus, the taste and texture of homemade cream cheese are unmatched—fresh, creamy, and perfectly tangy.
Environmental and Ethical Perks
Making your own cream cheese reduces packaging waste and supports local dairy farms. By sourcing high-quality milk and cream from ethical sources, you’re making an environmentally friendly and socially conscious choice.
Ingredients for Homemade Cream Cheese
Creating homemade cream cheese requires just a handful of simple ingredients. Here’s what you’ll need:
| Ingredient | Amount | Why It Matters | Substitutes |
|---|---|---|---|
| Whole milk | 4 cups | Forms the creamy base | 2% milk (less rich) |
| Heavy cream | 2 cups | Adds richness | Half-and-half |
| Lemon juice or vinegar | ¼ cup | Curdles the milk | Citric acid |
| Salt | ½ tsp | Enhances flavor | Kosher salt |
For the best results, use pasteurized milk rather than ultra-pasteurized, as it yields better curds. You can also experiment with variations like herbed or low-fat cream cheese to suit your taste preferences.
Equipment You’ll Need
Before starting, gather the following tools to make the process smooth and efficient:
- Heavy-bottomed pot
- Thermometer
- Cheesecloth or muslin
- Strainer
- Bowl
- Optional: Immersion blender for extra smooth texture
If you’re on a budget, many of these items can be found in your kitchen or purchased affordably online. High-quality equipment ensures consistency in your results.
Step-by-Step Homemade Cream Cheese Recipe
Making homemade cream cheese is easier than you think. Follow these simple steps for creamy, delicious results:
1. Heat Milk and Cream
In a heavy-bottomed pot, combine 4 cups of whole milk and 2 cups of heavy cream. Heat the mixture over medium heat until it reaches 180°F. Use a thermometer to monitor the temperature accurately. This step is crucial for separating the curds from the whey.
2. Add Acid
Slowly pour in ¼ cup of lemon juice or vinegar while stirring gently. You’ll notice the milk begin to curdle as the acid reacts with the proteins. If the curds don’t form immediately, add a bit more acid, one teaspoon at a time.
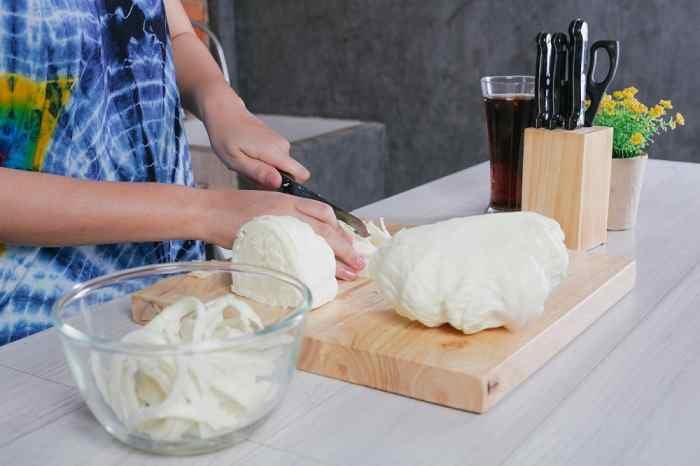
3. Strain the Curds
Line a strainer with cheesecloth and place it over a bowl. Pour the curdled mixture into the strainer, allowing the whey to drain. Let it sit for 8–12 hours, depending on how thick you want your cream cheese to be.
4. Blend and Store
Transfer the curds to a blender or food processor. Add ½ teaspoon of salt and blend until smooth and creamy. Store your homemade cream cheese in an airtight container in the fridge for up to 2 weeks.
Troubleshooting Common Issues
Even with careful preparation, you may encounter some challenges. Here’s how to address common problems:
| Problem | Cause | Fix |
|---|---|---|
| Runny texture | Excess whey | Drain longer |
| Grainy curds | Overheating | Stir gently and monitor temperature |
| Sour taste | Old milk | Use fresh milk |
With these tips, you’ll troubleshoot like a pro and ensure your cream cheese turns out perfect every time.
Flavour Variations and Storage
Creative Twists on Homemade Cream Cheese
Once you’ve mastered the basic recipe, try these delicious variations:
- Garlic Herb: Mix in minced garlic, fresh parsley, and dill.
- Smoked Salmon: Fold in finely chopped smoked salmon and chives.
- Strawberry: Blend in fresh strawberries and a touch of honey.
Storage Guide
Store your cream cheese in the fridge for up to 2 weeks. For longer storage, freeze it for up to 3 months. Thaw in the fridge before using and stir well to restore the creamy texture.
Delicious Ways to Use Homemade Cream Cheese
Homemade cream cheese is incredibly versatile. Here are some ways to enjoy it:
Classic Uses
- Spread on bagels, toast, or crackers.
- Use as a base for cheesecake.
- Incorporate into frosting for cakes and cupcakes.
Creative Recipes
- Stuffed veggies like jalapeños or mushrooms.
- Swirl into soups for added creaminess.
- Mix into dips for parties and gatherings.
Homemade Cream Cheese vs. Store-Bought: Full Comparison
| Aspect | Homemade | Store-Bought |
|---|---|---|
| Cost | Low | High |
| Ingredients | 4 natural | 10+ additives |
| Taste | Fresh, tangy | Processed |
Verdict: Homemade cream cheese wins for taste, health, and cost-effectiveness.
Nutritional Breakdown and FAQs
Nutritional Breakdown
Per 2 tablespoons:
- Calories: 100
- Protein: 2g
- Fat: 10g
- Sodium: 50mg
FAQs About Homemade Cream Cheese
- Can I make vegan homemade cream cheese? Yes, use cashews and nutritional yeast.
- Is homemade cream cheese safe? Absolutely, as long as you use pasteurized milk.
- How long does homemade cream cheese last? Up to 2 weeks in the fridge.
Conclusion and Next Steps
Homemade cream cheese is fresher, tastier, and more economical than store-bought options. With simple ingredients, easy steps, and endless flavor possibilities, it’s a must-try for any home cook. Ready to give it a go? Try the recipe today, and share your results in the comments below!