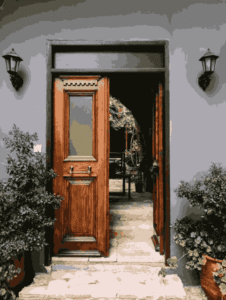
A faded brick feature can turn a plain room into a warm and inviting space. Brick slips make this easy by giving you the look of real brick without the weight, high cost, or long build time. You can use them for a kitchen splashback, a fireplace surround, or a café-style dining wall, all while installing them as easily as tile.
They offer a simple way to create a rustic style that feels real and adds character to any room. Keep reading to learn how brick slips work, why people love them, and how you can use them to create a lasting rustic finish.
What Brick Slips Are Made For
Brick slips are thin pieces cut from full bricks, giving you the look of real masonry in a lighter form. They copy the texture and color of solid brick while being easy to use on interior walls. Since they are decorative and not structural, they need a proper surface and adhesive to stay secure.
Real Brick Style Made Simple
Brick slips are a top pick when you want real brick charm without the heavy work. They give you more freedom to design your space with less effort. They maintain an authentic appearance while simplifying the installation process.
True Rustic Detail
Real brick faces hold natural pits, edges, and color shifts that bring rustic charm to any wall. Brick slips keep these details, giving surfaces an aged, tactile feel without imitating the look. Reclaimed slips add extra patina, while new clay slips offer cleaner and more uniform batches.
Light Build, Lower Cost
Brick slips cut weight and labor compared to full brickwork. They can be installed over existing walls or backing boards, thereby reducing structural work and overall project costs. Many thin-veneer systems also leave room for added insulation behind the slips.
Built to Last
Slips are fired like standard facing bricks, so they stand up well to wear, moisture, and everyday use. They stay clean with mild soap and a quick rinse, keeping their rustic look with little upkeep. This makes them stronger and longer-lasting than many decorative wall finishes.
Flexible for Any Style
Brick slips work for full walls, borders, arches, and even stacked designs. You can paint them, limewash them, or show off their natural texture. With many sizes and finishes available, they fit both classic rustic themes and modern, textured interiors.
Choosing the Right Brick Slips
Brick slips come from new clay, reclaimed bricks, or engineered materials that look like brick. Each type has benefits, like reclaimed slips with natural character or new slips with steady size and color. Check water absorption, frost resistance, and recommended uses to make sure they work well for kitchens, bathrooms, or exterior walls.
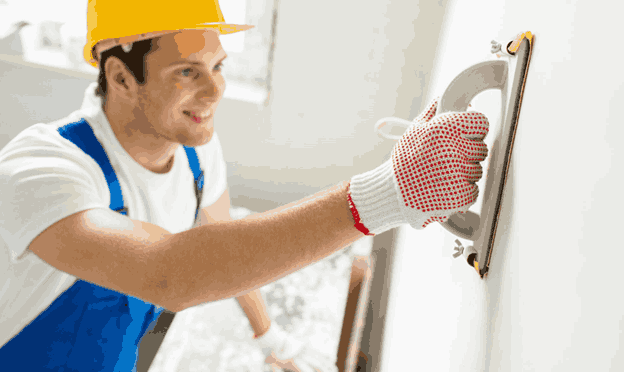
Masonry Steps for a Strong Brick Slip Installation
Brick slips are installed much like tiles but require a few extra masonry steps to ensure long-term strength. These steps help the slips bond securely and stay stable under changing conditions. Following them closely leads to a durable, professional-looking finish.
Preparing the Base Surface
Ensure the wall is flat, stable, and clean before installing brick slips. Common backing options include plasterboard, cement board, or rendered blockwork. Proper prep helps the slips bond well and stay secure over time.
Selecting the Right Adhesive System
Use adhesives or mortars designed for thin brick veneer to ensure reliable installation. Depending on the method, you may need thin-set, thick-bed mortars, or pre-cast panel systems. Heavy exterior cladding may also require metal lath or mechanical fixings for extra support.
Planning Joints and Movement
Include movement joints in large areas to prevent cracking as the wall shifts over time. Aim to align these joints with existing substrate joints for a cleaner appearance. Choose the joint width and finish early, as both will strongly influence the final style.
Grouting and Final Finishing
Choose a mortar that harmonizes with the brick for a seamless rustic appearance, or opt for a contrasting grout to highlight each brick. After the grout hardens, clean off any haze for a crisp finish. Apply breathable sealers only when the manufacturer recommends them to protect the surface without trapping moisture.
Common Mistakes to Avoid
Skipping surface prep can lead to cracks or loose brick slips if the wall is uneven or weak. Using the wrong adhesive also causes failure, so only use mortars made for brick slips. Leaving out movement joints or applying heavy sealers on reclaimed bricks can create cracks or trap moisture.
Design Choices That Shape the Look
Small design decisions can change the whole feel of a brick slip wall. Mortar color affects contrast, layout patterns shift the style, and placement helps create strong focal points. Carefully mixing bonds, tones, and trims maintains clarity and visual appeal in the design.
Keeping Brick Slip Walls Looking Good
Brick slips need little care, and most surfaces clean easily with dusting or a damp cloth. Limewashed or reclaimed bricks should be handled gently, so avoid harsh cleaners and test products first. For outdoor walls, good drainage, breathable mortar, and freeze-thaw rated slips help the finish stay strong for decades.
Making Smart Choices When Buying Brick Slips
Brick slips cost less than full brickwork because they use fewer materials and need less labour. Reclaimed slips add character and lower carbon impact, while new clay slips offer steady quality and pricing. Always ask for samples, datasheets, and guidance on adhesives so you can test the look and choose the right system for your project.
A Strong, Stylish Finish for Any Space
Brick slips make it easy to add real texture, rustic style, and solid quality to any room. They keep the charm of old brick while cutting cost and build time, making them great for fast updates or full redesigns. With brick slips, you can upgrade a kitchen, warm a living room, or shape a standout wall that feels natural and timeless.
Now is a good time to bring your plans to life. Order sample packs, check simple install steps, and sketch out a wall that fits your style. Sign up for supplier updates or request free samples to see colors and textures at home.
Start today and enjoy a finish that lasts and keep reading our blog for more ideas and guides.